

The secret to a high-end “faux-ceramic” finish isn’t the paint recipe—it’s mastering surface prep, structural additions, and professional styling principles.
- Proper adhesion is non-negotiable; sanding glass and choosing the right glue (like E6000 or epoxy) is the first step to a lasting finish.
- The final look is determined by the sealer. A matte or satin finish creates an authentic earthenware effect, while gloss mimics expensive porcelain.
Recommendation: Before you even mix your paint, plan your vase’s final form and finish. Start by adding structural elements like handles or feet with epoxy putty for a truly custom shape.
You’ve seen them all over your feed: gorgeous, textured ceramic vases with an earthy, minimalist vibe. The price tag, however, can be anything but minimal. The viral “baking soda paint” hack promises a budget-friendly solution, turning any thrift store glass into a pottery masterpiece. But many who try it end up with a streaky, peeling craft project rather than a high-end dupe. The internet is full of the basic recipe, but it rarely talks about the common pitfalls or the design theory that separates a convincing piece from a clear DIY.
The problem isn’t the recipe itself. The real magic lies in what happens before and after you paint. It’s about understanding materiality and surface adhesion to ensure your paint job lasts. It’s about strategically altering the form of the original glass so it’s no longer recognizable. And most importantly, it’s about applying professional interior design principles to style your finished creations. This isn’t just a craft tutorial; it’s a guide to thinking like a designer to replicate a high-end aesthetic on a dollar-store budget.
Instead of just following steps, we’re going to explore the ‘why’ behind each choice. We’ll cover everything from the right glue that won’t peel off smooth glass to the professional styling tricks that make your objects look curated and intentional. By the end, you’ll have the skills not just to make a faux-ceramic vase, but to create a decorative object that genuinely elevates your space.
For those who prefer a visual walkthrough, the following video breaks down the core technique of upcycling vases with baking soda paint, providing a great starting point for your project.
To help you master this technique from foundation to finish, this guide is structured to walk you through the crucial decisions you’ll need to make. We’ll cover everything from structural integrity and surface finishes to the art of styling your final pieces.
Summary: Creating a High-End Ceramic Dupe
- Hot Glue vs. E6000: Which Glue Won’t Peel Off Smooth Glass?
- Wire Armature: How to Stop Your Clay Sculptures from Drooping?
- Matte vs. Gloss: Which Sealer Makes DIY Clay Look Like Professional Porcelain?
- How to Update Your Living Room for Under $200 Without Painting?
- Brass and Chrome: Can You Mix Metals in the Same Bathroom?
- The “Rule of Three”: How to Style Your DIY Objects on a Shelf?
- Macramé: Is It Still Trendy or Should You Switch to Tufting?
- Shipping Fragile Crafts: How to Pack Handmade Ornaments so They Don’t Break?
Hot Glue vs. E6000: Which Glue Won’t Peel Off Smooth Glass?
The most common failure in advanced faux-ceramic projects is when additions—like clay handles or feet—pop right off the slick glass surface. Your paint job can be perfect, but if the underlying structure fails, the illusion is broken. This isn’t about the paint; it’s about surface adhesion. Hot glue is fast, but it creates a weak, temporary bond on non-porous surfaces like glass. For a permanent, paintable bond, you need an industrial-strength adhesive.
The key to making any glue work better is surface preparation. Glass is smooth, offering nothing for an adhesive to grip. As detailed in a guide on achieving optimal adhesion, you must first create a little ‘tooth’. A quick pass with fine-grit sandpaper to lightly sand your vase is a non-negotiable first step. Wiping the surface with isopropyl alcohol afterward removes any oils that could interfere with the bond. For the strongest possible hold when adding structural elements, epoxy putty is often the superior choice as it chemically bonds and becomes part of the object itself.
To make the best choice for your project, consider the trade-offs between speed, strength, and ease of use. This comparison breaks down the most common options for bonding to glass.
| Adhesive Type | Bond Strength | Dry Time | Paint Compatibility | Clean-up Ease |
|---|---|---|---|---|
| Hot Glue | Medium | 30 seconds | Good | Easy when warm |
| E6000 | Very Strong | 24 hours | Excellent | Difficult |
| Epoxy Putty | Strongest | 5-10 minutes | Excellent | Before curing only |
Ultimately, while hot glue has its place for quick mock-ups, for a piece you want to last, E6000 or epoxy putty are the professional choices. They ensure your creative additions will withstand painting, handling, and time.
Wire Armature: How to Stop Your Clay Sculptures from Drooping?
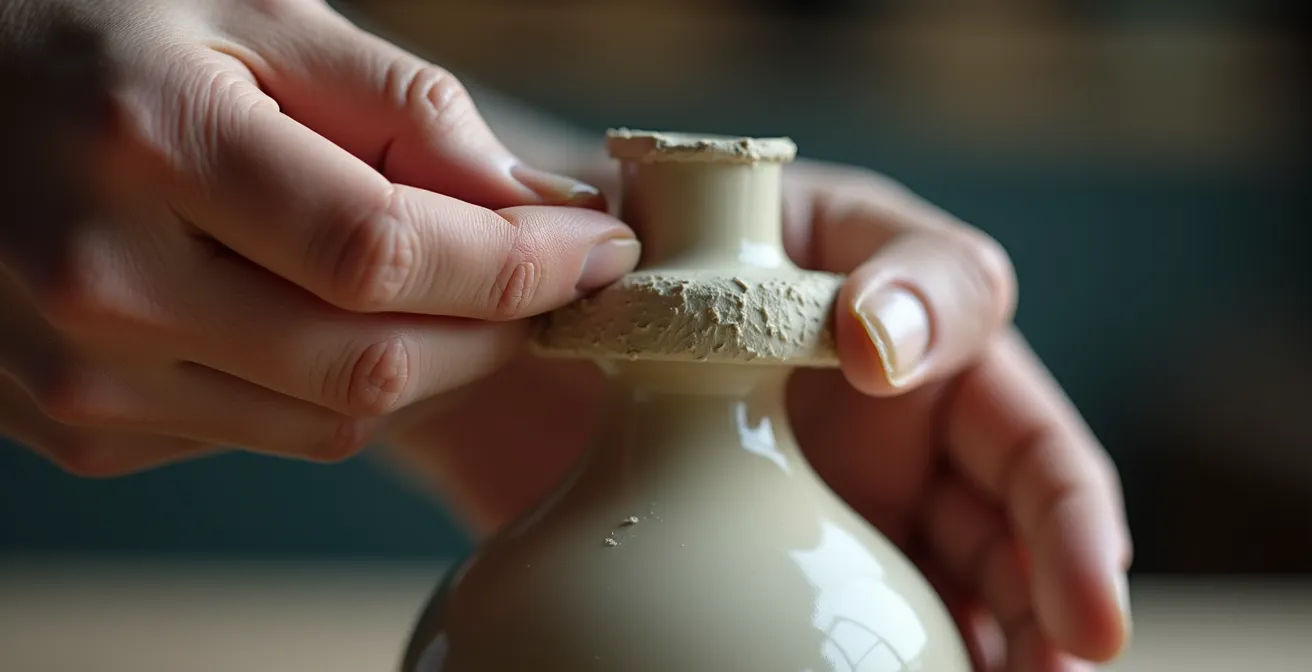
While the title mentions wire armature, a common technique in traditional sculpture, the real goal when upcycling glass is to add structural and decorative elements that transform the original silhouette. You’re not just painting a vase; you’re creating a new form. This is where you can add handles, feet, or organic shapes using air-dry clay or epoxy putty to make the piece feel truly custom and less like a recognizable bottle or jar. The challenge is ensuring these additions are stable, well-blended, and don’t droop or crack as they dry.
The key to success is building a solid foundation. You need to create a seamless transition from glass to clay, achieving what designers call textural cohesion. This ensures that once painted, the entire piece looks like a single, unified object. A wire isn’t always necessary for smaller additions, but proper application and curing are critical. The process involves more than just sticking on some clay; it’s a multi-step method of preparing, applying, shaping, and curing.
To achieve a professional-looking result, follow these essential steps. According to DIY experts, this process ensures your additions not only stick but also look like an integral part of the final piece. The full process involves several key stages:
- First, thoroughly clean and etch the glass surface where additions will be attached for better adhesion.
- Apply your chosen material—epoxy putty or air-dry clay—to create handles, feet, or decorative elements.
- Crucially, allow these structural additions to fully cure, which can take 24-72 hours depending on the material.
- Once cured, sand and shape the additions to blend them seamlessly with the glass form.
- Finally, apply your baking soda paint mixture over the entire piece, including the new additions, for a unified, cohesive appearance.
Matte vs. Gloss: Which Sealer Makes DIY Clay Look Like Professional Porcelain?
The final step that truly sells the “faux-ceramic” illusion is the sealer. This topcoat does more than just protect your paint job; it defines the materiality of the piece. Do you want it to look like rustic, unglazed terracotta or expensive, high-shine porcelain? The choice between a matte, satin, or gloss finish is the single most important decision for achieving your desired aesthetic. A common question is whether the paint will wash off, and without a proper sealer, the answer is often yes, especially if exposed to moisture. A good sealer makes the finish durable.
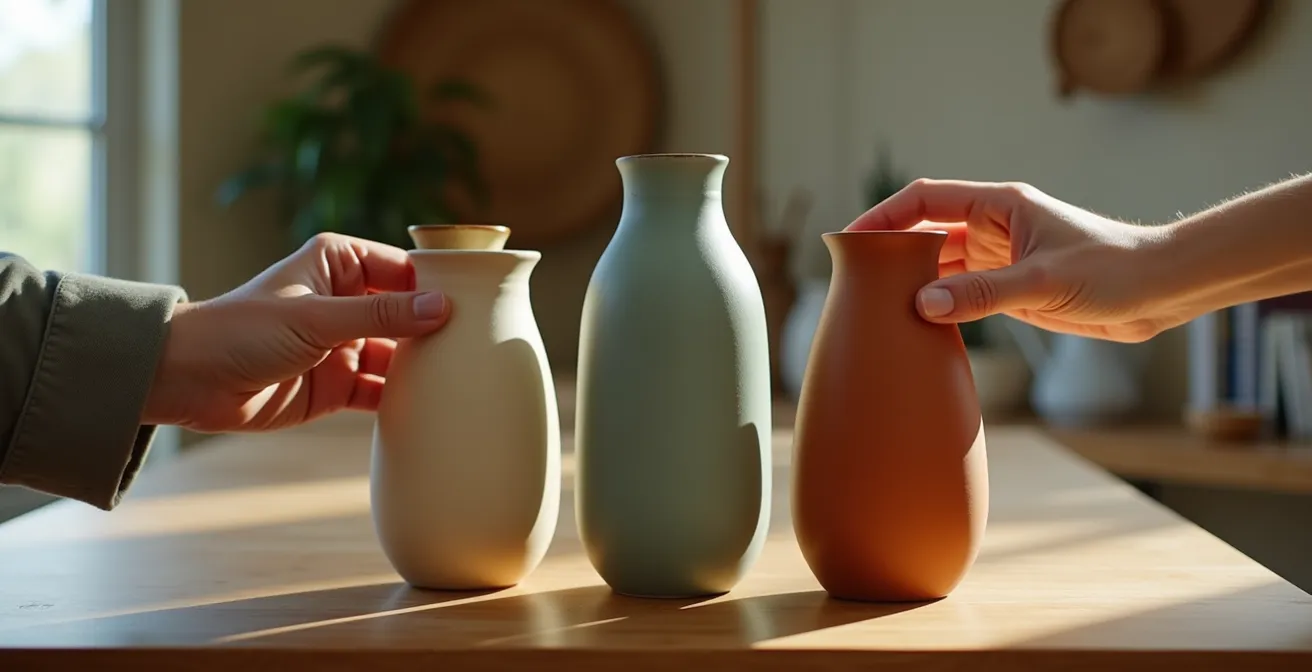
For an authentic, earthy, and modern look that mimics unglazed stoneware or terracotta, a matte or satin sealer is your best bet. These finishes absorb light and emphasize the gritty texture created by the baking soda. On the other hand, if you’re aiming for a high-end, glazed porcelain effect, you need a gloss or high-gloss sealer. These create an extremely lustrous and hard final finish, reflecting light and giving the piece a sense of polish and expense. Polyurethane-based sealers, like GlazeGuard®, are known for creating a very hard-wearing and long-lasting barrier, which is ideal for a gloss effect.
This table breaks down how each finish impacts the final look and durability of your piece, helping you choose the right one for your desired ceramic style.
A comparison guide for ceramic sealers shows the distinct effects of each finish. A matte finish offers a shine-free surface perfect for an authentic terracotta look. A satin finish provides a subtle sheen ideal for a modern ceramic appearance. For a high-end effect, a gloss finish delivers a lustrous, smooth, and hard surface that mimics fine porcelain, while high-gloss creates a mirror-like reflective quality for a fully glazed look.
| Finish Type | Visual Effect | Best For | Durability |
|---|---|---|---|
| Matte | Shine-free protective surface | Authentic terracotta look | Good dust protection |
| Satin | Subtle sheen between matte and gloss | Modern ceramic appearance | Balanced protection |
| Gloss | Extremely lustrous, smooth and hard final finish | High-end porcelain effect | Best water resistance |
| High-Gloss | Mirror-like reflective surface | Glazed pottery look | Maximum durability |
No matter which finish you choose, proper application is key. To get a flawless, factory-perfect result, ensure your painted vase is completely dry. Apply the sealer in thin, even coats with a soft brush, allowing each coat to dry thoroughly before applying the next. This layered approach prevents drips and ensures complete coverage for a durable, professional look.
How to Update Your Living Room for Under $200 Without Painting?
Creating your own designer-inspired accessories is the first step, but the real impact comes from integrating them into your space. A full room makeover doesn’t have to mean expensive furniture or messy paint jobs. With a budget of under $200, you can strategically use texture, lighting, and accessories to completely refresh your living room’s vibe. Your new faux-ceramic vases become the centerpiece of this transformation, setting the tone for a curated and intentional design.
The strategy is to focus on high-impact, low-cost items. Think in layers: textiles for softness, lighting for ambiance, and decorative objects for personality. Start with your thrifted vases, then build around them. Grouping three pillows of similar colors but different sizes on a sofa, along with a throw, is a classic designer trick to add a trio of color and texture instantly. Accent lighting, like inexpensive LED puck lights placed behind a plant or inside a cabinet, can dramatically change the mood of a room for very little investment.
Here is a sample shopping list that demonstrates how you can pull together a cohesive and stylish room update while staying well within a $200 budget:
- Thrift store glass vases (3-5 pieces): $15-25
- Acrylic paint and baking soda for faux ceramic finish: $10-15
- LED puck lights or string lights for accent lighting: $20-30
- Throw pillows from discount stores (set of 3): $30-45
- Dried botanicals or branches for vase arrangements: $15-20
By focusing your spending on these key elements, you can create a powerful visual update. The combination of your handmade vases, soft textiles, and warm lighting works together to make the entire space feel new, thoughtfully designed, and deeply personal—all without touching a paintbrush.
Brass and Chrome: Can You Mix Metals in the Same Bathroom?
The question of mixing metals like brass and chrome extends to a broader design principle: how to mix textures and finishes for a sophisticated, layered look. The answer is a resounding yes, you can and should mix them! The key is to do it with intention. A room with only one metal finish can feel flat and dated. Introducing a second or third finish—like pairing your matte faux-ceramic vases with polished brass or sleek chrome accents—adds depth, character, and visual weight.
The secret to successful mixing is to establish a dominant finish and use others as accents. A great guideline is the 80/20 rule: let one texture or material (like the matte finish of your ceramics) dominate about 80% of the pieces, and use the contrasting material (like shiny metal) for the remaining 20%. This creates a cohesive look that still feels dynamic. For example, you could have a collection of three faux-ceramic vases on a shelf, with a single, small brass candleholder or a chrome-framed picture nearby.

This principle of intentional contrast is what separates a cluttered look from a curated collection. It’s about creating a dialogue between objects. The rough, matte texture of your DIY vase is beautifully highlighted when placed next to the smooth, reflective surface of a metallic object. This interplay of light and texture tricks the eye into seeing more value and sophistication in the arrangement. So, don’t be afraid to place your handmade creation next to that brass lamp or silver tray; that contrast is precisely what will make it shine.
The “Rule of Three”: How to Style Your DIY Objects on a Shelf?
You’ve created a beautiful set of faux-ceramic vases. Now, how do you arrange them so they look like a deliberate design moment and not just clutter? The answer lies in one of the most fundamental principles of interior design: the Rule of Three. This rule states that objects arranged in odd numbers—particularly groups of three—are more visually appealing, memorable, and dynamic than even-numbered groupings. An arrangement of two vases can feel static and confrontational, while three creates a sense of harmony and natural movement.
Applying the rule is more than just placing three things together. The magic happens when you vary their attributes. For a classic styling vignette, you should group three objects with varying heights: a tall “anchor” piece, a shorter “companion” piece, and a small, low “accent” piece. This variation encourages the eye to move up and down, creating a pleasing visual triangle. You should also mix different objects; for example, combine two of your DIY vases with a small plant, a candle, or a stack of books to create a more interesting story.
Interestingly, our eyes are smart enough to group items automatically. An interior designer’s application of the rule explains that even if a table has six items on it, our eyes might only perceive three distinct groups. A runner, a plant, and a cluster of three candlesticks are seen as three elements, not six. To elevate your styling even further, follow these advanced principles:
- Vary heights dramatically: Ensure a clear difference between your tall, medium, and small objects.
- Apply the 60-30-10 Rule for color: In your vignette, let one color be dominant (60%), a second support it (30%), and a third act as a small pop of accent (10%).
- Create visual triangles: The tops of your three objects should form an invisible triangle, guiding the eye through the arrangement.
- Leave breathing room: Keep 2-3 inches of space between your pieces to prevent a cluttered look while maintaining a sense of connection.
Macramé: Is It Still Trendy or Should You Switch to Tufting?
Placing your faux-ceramic project within the broader context of DIY and decor trends is key to understanding its appeal. For years, the go-to texture trend was macramé, with its boho, natural aesthetic. More recently, tufting exploded in popularity, offering a plush, maximalist vibe. So where does the faux-ceramic trend fit in? Is macramé over? Should you be tufting instead? The answer is that each trend serves a different aesthetic, and faux-ceramics are filling a crucial gap for a minimalist, wabi-sabi inspired look.
While interest in macramé may have slightly softened from its peak, the trend isn’t disappearing. A 2024 trend report notes that macramé continues to be popular in 2024, expanding from wall art into fashion accessories. At the same time, tufting workshops have cemented themselves as top sellers in the craft world, appealing to those who love bold color and retro styles. Faux-ceramics, however, are emerging as a powerful third option. It caters to a desire for organic shapes, neutral palettes, and a sophisticated, sculptural feel that neither macramé nor tufting quite captures.
This comparison matrix helps clarify where each trend stands in 2024, highlighting their market saturation and ideal aesthetic.
| Craft Trend | 2024 Status | Market Saturation | Best For |
|---|---|---|---|
| Macramé | Slightly less interest compared to past years, but trend isn’t dropping off | Medium-High | Boho & Natural Aesthetics |
| Tufting | Rising rapidly | Low-Medium | Maximalist & Retro Styles |
| Faux Ceramics | Emerging trend | Low | Minimalist & Wabi-Sabi |
Choosing to make faux-ceramic vases positions you at the forefront of an emerging trend. It offers a way to engage with texture that feels fresh, modern, and aligned with the move towards minimalist, high-end aesthetics. It’s not about ditching other crafts, but about adding a new, sophisticated tool to your creative arsenal.
Key Takeaways
- True high-end results come from focusing on structure and finish, not just the paint recipe.
- Proper surface preparation (sanding and cleaning glass) and using strong adhesives (like E6000) are essential for durability.
- Styling is as important as the craft itself; use the Rule of Three and mix textures to create a professional, curated look.
Shipping Fragile Crafts: How to Pack Handmade Ornaments so They Don’t Break?
Once you’ve mastered the art of creating beautiful, high-end faux-ceramic pieces, you might consider selling them. But all your hard work can be undone in transit if not packed correctly. Shipping fragile, handmade items—especially those with delicate additions—requires a specific methodology to ensure they arrive in one piece. The fear of breakage is real, but a professional packing process can virtually eliminate the risk.
The industry-standard technique is the double-boxing method. This involves placing your wrapped item inside one box, and then placing that box inside a larger shipping box with at least two inches of cushioning material (like packing peanuts, bubble wrap, or crinkle paper) on all sides. According to professional shipping guidelines, this creates a crucial buffer zone that absorbs shocks and impacts during transit, minimizing the risk of damage. Don’t skimp on bubble wrap; each piece should be wrapped in 3-5 layers and secured with tape.
The final “shake test” is your ultimate quality control. Once everything is packed, you should be able to shake, lift, and even flip the box without feeling or hearing any movement inside. If anything shifts, you need to add more cushioning. Following a professional checklist ensures you don’t miss a single step in this crucial final stage of your creative process.
Action Plan: Your Professional Pottery Shipping Checklist
- Use a brand-new, sturdy corrugated cardboard box for your primary container.
- Wrap each individual piece in 3-5 layers of bubble wrap, securing all seams with packing tape.
- Place the wrapped item in the primary box, ensuring a minimum of 2 inches of cushioning on all sides.
- Perform the shake test: if you can shake, lift, and flip the box without any internal movement, you are ready to seal it.
- Use a shipping software platform to access Commercial Pricing discounts, which can be up to 89% off retail rates.
Now that you’re equipped with the techniques to create, style, and even ship your creations, it’s time to start your first project. Begin by visiting a thrift store and looking at glass not for what it is, but for what it could be. Happy making!