
The most common outdoor kitchen planning mistake is focusing on appliances instead of logistics, turning the host into a frazzled server.
- Treat your outdoor kitchen as a chef would: a self-sufficient “satellite service station,” not just a place for a grill.
- Prioritize workflow and eliminating “trips inside” over simply creating “zones” for cooking and cleaning.
Recommendation: Before buying anything, perform a ‘Trip Inside’ Audit at your next BBQ. Every time you go indoors, write down why. That list is your true blueprint for an efficient outdoor kitchen.
The scene is painfully familiar. You’ve invested in a beautiful outdoor space, the grill is fired up, and guests are mingling. Yet, you spend the entire event in a frantic loop: run inside for tongs, back out to flip burgers, inside for the salad dressing, back out, inside for a serving platter, back out again. You’ve become the party’s dedicated server, not its host. The dream of effortless outdoor entertaining has been replaced by the reality of logistical chaos. Most advice focuses on the hardware—choosing stainless steel, creating “hot and cold zones”—but this misses the fundamental point.
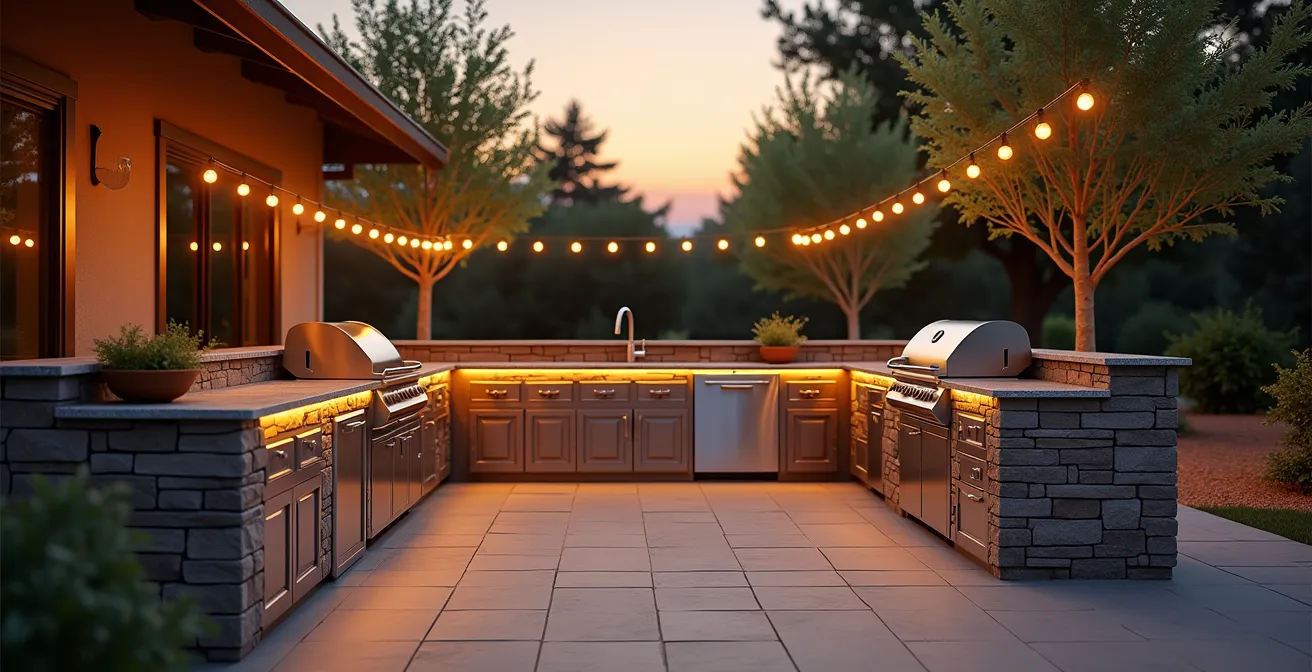
The problem isn’t a lack of equipment; it’s a failure of workflow. A truly functional outdoor kitchen isn’t just a collection of appliances exposed to the elements. From a professional chef’s perspective, it must be designed as a satellite service station: a self-sufficient outpost engineered to execute a full service without relying on the main indoor kitchen. This requires a shift in thinking from “What should I buy?” to “What logistical problems must I solve?”. The goal is to eliminate every single reason that could force you to abandon your post and your guests.
This guide abandons the builder’s mindset in favor of the chef’s. We will deconstruct the common failure points of outdoor hosting—from food safety in the summer heat to lighting that actually works—and provide systematic solutions. We’ll analyze the true maintenance costs of different surfaces and the real economics of your time. By focusing on workflow, efficiency, and guest experience, we will build a plan that ensures you spend less time running and more time hosting.
This article provides a strategic framework for planning your outdoor culinary space. Follow this roadmap to address the most critical logistical challenges that turn a host into a runner, ensuring your investment pays off in seamless, enjoyable gatherings.
Summary: Planning an Efficient Outdoor Kitchen
- The Temperature Danger Zone: How Long Can Potato Salad Sit Out Safely?
- Yellow Jackets at the Table: Non-Toxic Ways to Keep Wasps Away
- Candles vs. Overhead: How to Light a Table so Guests Can See What They Eat?
- Why Cheese Boards Fail in July (And What to Serve Instead)
- Gas vs. Charcoal: Which Grill Type Is Safer on a Wooden Deck?
- Will Solar String Lights Actually Last Through a 4-Hour Dinner Party?
- Pavers or Decking: Which Requires Less Annual Maintenance?
- Meal Prep vs. Meal Kits: Which is Actually Cheaper for a Family of Four?
The Temperature Danger Zone: How Long Can Potato Salad Sit Out Safely?
The single greatest point of failure in outdoor entertaining is not the grill; it’s ambient food safety. That creamy potato salad, a staple of any barbecue, becomes a liability the moment it leaves the refrigerator. For chefs, the rule is absolute: perishable food enters the “temperature danger zone” between 40°F (4°C) and 140°F (60°C), where bacteria can double in as little as 20 minutes. The common “two-hour rule” is a guideline for indoor, climate-controlled environments. Outdoors, on a warm day, that window of safety can shrink dramatically.
Relying on a cooler is a passive, and often failing, strategy. The constant opening and closing introduces warm air, rendering it ineffective for maintaining a precise temperature for ready-to-eat dishes. A professional approach requires an active cooling system built into your service workflow. It’s not about just keeping things “cold,” but about verifiably keeping them below 40°F. This means using methods that are visible and measurable throughout the event.
The most effective technique is the nested bowl method. Your serving bowl sits inside a larger bowl filled with ice, creating a “cold buffer” that constantly draws heat away from the food. This isn’t a “set it and forget it” solution; the ice needs to be replenished as it melts. A digital probe thermometer with an alarm set for 41°F is your best line of defense, transforming a guessing game into a controlled process. This proactive management of the temperature danger zone is a core principle of a chef-designed satellite kitchen.
Yellow Jackets at the Table: Non-Toxic Ways to Keep Wasps Away
Nothing disrupts a guest’s experience faster than a swarm of yellow jackets descending on the dining table. The typical response—ineffective citronella candles or frantic swatting—only escalates the problem. From a logistical standpoint, pests are a predictable variable that must be managed proactively, not reactively. The key is to understand their motivation: they are foraging for protein and sugar. The solution is not to repel them from your table, but to redirect them entirely.
This is where the “decoy buffet” strategy comes into play. It’s a classic crowd-control technique applied to pests. At least 30 minutes before you serve food to your guests, you establish a small, more attractive food source 20-30 feet away from the main dining and cooking areas, preferably downwind. This decoy should contain a potent combination of protein (a small amount of canned cat food or tuna works exceptionally well) and a sweet item (a slice of overripe fruit or a dab of jam).
This method works by intercepting the wasps’ foraging paths before they ever discover your meal. Professional caterers have found this simple tactic can reduce pest presence at the main table by a staggering 80%. It’s a non-toxic, stress-free solution that treats the problem at its source. By incorporating this into your pre-service checklist, you transform pest control from a chaotic reaction into a deliberate, effective part of your hosting system.
Candles vs. Overhead: How to Light a Table so Guests Can See What They Eat?
Poor lighting is a silent party killer. When dusk falls, a beautifully prepared meal can be reduced to a collection of shadowy shapes on a plate. Guests shouldn’t have to use their phone flashlights to see what they’re eating. The common mistake is relying on a single light source, like overly bright overhead floodlights that create harsh glare, or romantic candles that provide almost no functional illumination. A professional lighting plan isn’t about brightness; it’s about layers.
An effective outdoor lighting system consists of three distinct layers working in concert: ambient, task, and accent. This three-layer system ensures both mood and function without creating glare. This illustration breaks down how these layers should be deployed in a typical outdoor dining setup.
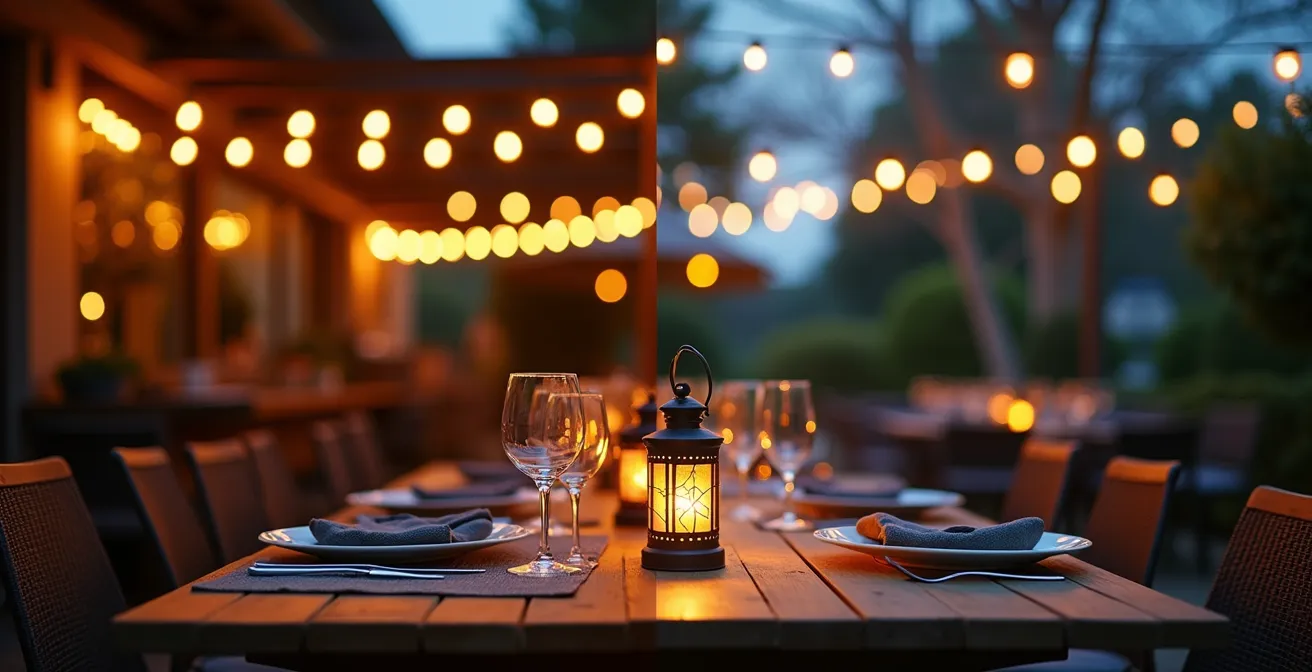
As you can see, each layer has a specific job. Ambient lighting (e.g., dimmable string lights) sets the overall mood and provides general, low-level illumination. Task lighting (e.g., focused spotlights) is non-negotiable and must be directed precisely onto your work surfaces—the grill, the prep counter. Finally, accent lighting (e.g., battery-powered table lanterns) provides a soft, direct glow on the dining table itself, allowing guests to see their food and each other without being blinded.
This table outlines the specific requirements for each lighting type, shifting the focus from random fixture selection to a system based on purpose and measured output.
| Light Type | Lumens Needed | Dimmer Required | Best Application |
|---|---|---|---|
| String Lights (Ambient) | 200-400 total | Yes | Overall mood setting |
| Task Lights (Cooking) | 800-1200 per fixture | Optional | Grill and prep areas |
| Table Lanterns (Accent) | 100-200 each | No | Dining table centerpiece |
| Solar Path Lights | 50-100 each | Auto-dimming | Walkways and perimeter |
Why Cheese Boards Fail in July (And What to Serve Instead)
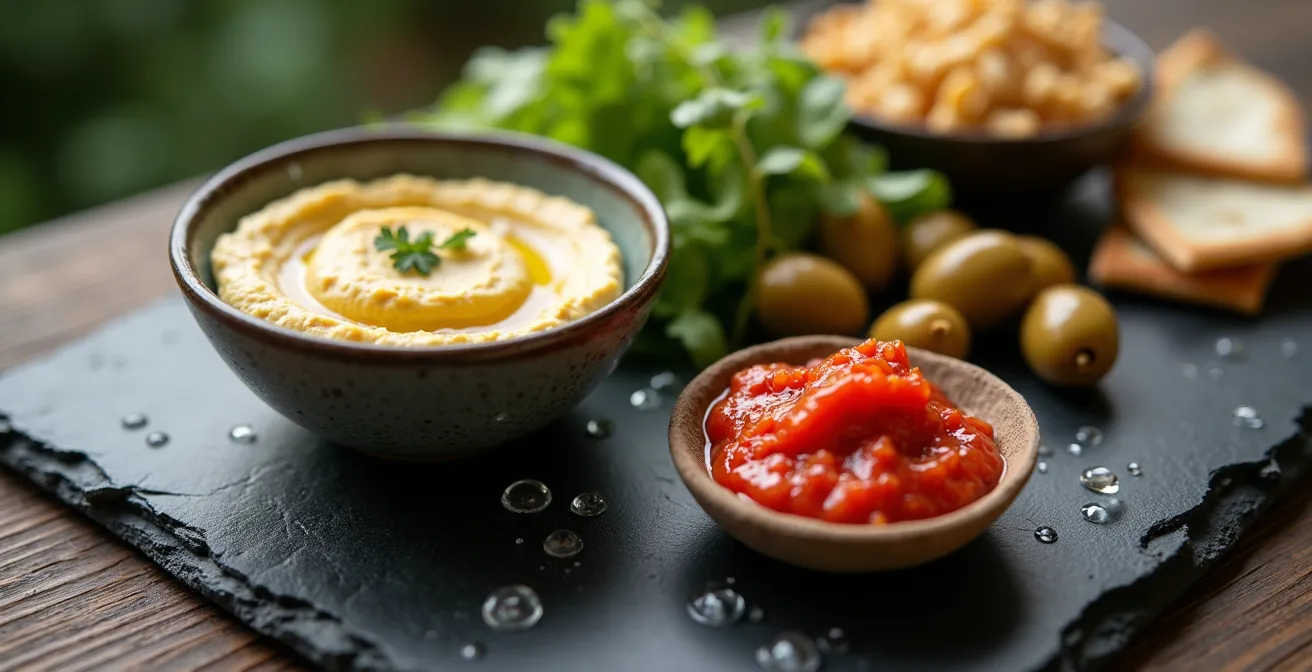
The elegant cheese board, a staple of indoor entertaining, becomes a culinary disaster in the summer heat. Soft cheeses like brie and goat cheese begin to “sweat” and break down within minutes, losing their texture and appeal. The logistical challenge is maintaining a food-safe temperature and quality for an item designed for grazing over a long period. In an outdoor setting, this is a losing battle that creates food waste and a poor guest experience.
The chef’s solution is not to fight the environment, but to adapt the menu to it. Instead of a traditional dairy-heavy board, a Mediterranean mezze platter is a far more robust and logistically sound alternative. Dips like hummus and baba ganoush, along with olives, marinated vegetables, and pita bread, are naturally more stable at ambient temperatures. In fact, an analysis by catering professionals found that switching to mezze platters can reduce food waste by 60% at summer events compared to cheese boards.
If you’re committed to serving cheese, you must change the serving vessel. The “chilled slate hack” is a professional technique that extends the life of your board. By freezing a thick marble or slate slab for several hours before service, you create a passive cooling surface that draws heat away from the cheese. This method works best with hard, aged cheeses like Parmesan, Manchego, or aged cheddar, which are inherently more stable. Pairing them with frozen grapes acts as an edible, functional cooling buffer within the arrangement itself.
Gas vs. Charcoal: Which Grill Type Is Safer on a Wooden Deck?
Placing a fire-breathing appliance on a flammable wooden surface is an inherently risky proposition that demands a logistical, safety-first approach. The choice between gas and charcoal is less about flavor and more about risk mitigation in this context. While both pose a fire hazard, a gas grill is demonstrably safer for use on a wooden deck. Its heat is more contained, the flame is controllable, and there is no risk of hot embers falling or being carried by the wind onto the deck boards.
Charcoal grills, by their nature, produce flying sparks and hot ash, and the intense radiant heat from the bottom of the kettle can damage or even ignite the wood over time. Regardless of grill type, a high-quality, fire-resistant grill mat is not optional; it’s a mandatory piece of safety equipment. Furthermore, placement is critical. Building codes are clear: a grill must be placed a minimum of 10 feet from any combustible structure, including the siding of your home and deck railings.
The material of your deck itself is a major factor in your risk profile. While natural wood is a common choice, its susceptibility to heat and fire is a significant liability. The following table provides a clear comparison of how different decking materials perform under the stress of a hot grill, which should heavily influence your surface choice in a new build or renovation.
| Deck Material | Heat Resistance | Required Protection | Replacement Cost Risk |
|---|---|---|---|
| Natural Wood | Moderate | Fire-resistant mat | $15-25/sq ft |
| Composite Decking | Low (melts) | Stand-off pad + mat | $25-35/sq ft |
| PVC Decking | Very Low | Heat shield required | $30-45/sq ft |
| Aluminum Decking | High | Basic mat only | $10-15/sq ft |
Will Solar String Lights Actually Last Through a 4-Hour Dinner Party?
Solar-powered string lights promise an easy, wire-free ambiance, but they often become a point of failure mid-event. The answer to whether they’ll last depends entirely on a single, often-overlooked technical specification: battery capacity. Most inexpensive solar lights fail because their batteries are too small to hold a charge sufficient for prolonged use. For a light set to reliably last a full 4-hour dinner party, especially after a less-than-perfectly-sunny day, it needs a battery with a minimum capacity of 2000mAh.
Relying solely on the sun introduces an unacceptable level of uncertainty for a host planning an important event. A chef would never leave a critical system to chance. The professional solution is to create redundancy by employing a “hybrid power strategy.” This involves choosing solar lights that also include a USB charging port—a feature becoming more common on higher-quality models. This dual-power capability allows you to eliminate any risk of a mid-party blackout.
By connecting the lights to a pre-charged USB power bank just before the event, you guarantee a full “tank” of energy, regardless of how sunny it was during the day. This backup power can be easily concealed in a planter or behind a decorative object, maintaining the clean, wire-free aesthetic. This simple, inexpensive step transforms an unreliable element into a foolproof part of your lighting system.
Your Action Plan: The Hybrid Power Strategy for Guaranteed Lighting
- Choose solar lights with dual power capability (solar + USB input).
- Purchase a 10,000mAh USB power bank as a dedicated backup for your lighting system.
- Connect the fully charged power bank to the lights 30 minutes before sunset on event day.
- Hide the power bank and any minimal wiring in a decorative planter or basket near the lights.
- After the event, disconnect the bank and switch the lights back to solar-only mode for daily charging.
Pavers or Decking: Which Requires Less Annual Maintenance?
The flooring of your outdoor kitchen is the stage for your culinary activities, and it will be subject to constant abuse: grease splatters, spilled wine, dropped utensils, and heavy foot traffic. From a logistical perspective, the best flooring is the one that requires the least amount of your time and effort to maintain. While wood and composite decking are popular, their annual maintenance burden is significant, involving staining, sealing, and specialized cleaning to prevent mold and mildew.
Concrete pavers present a different challenge: while durable, their porous surface is a magnet for grease stains that are nearly impossible to remove completely. They are also prone to weeds growing in the joints and can settle unevenly over time, creating a maintenance headache. This is why, in professional and high-end residential designs, there has been a significant shift towards a more resilient material. The “porcelain tile revolution” has taken hold, with large-format porcelain pavers seeing a 40% growth in market share since 2023 for outdoor applications.
Porcelain pavers offer a near-zero maintenance solution. They are non-porous, meaning they resist all common kitchen stains—oil, wine, and berry juice can be wiped away without a trace. They require no annual sealing and their color and texture do not fade over time. The “annual maintenance” is reduced to simple cleaning with soap and water. When you quantify the time investment, the choice becomes clear.
| Material | Annual Hours | Maintenance Type | Stain Cleanup Ease |
|---|---|---|---|
| Wood Decking | 16-20 hours | Predictable (staining) | Difficult |
| Composite Decking | 4-6 hours | Predictable (cleaning) | Moderate |
| Concrete Pavers | 8-12 hours | Unpredictable (weeds/settling) | Very Difficult |
| Porcelain Pavers | 1-2 hours | Cleaning only | Very Easy |
Key Takeaways
- Shift your mindset from building a “kitchen” to designing a “satellite service station” to eliminate trips inside.
- Proactively manage risks like food safety, pests, and lighting failures with systematic, chef-approved strategies.
- Choose materials and solutions based on minimizing long-term maintenance and maximizing your time spent with guests.
Meal Prep vs. Meal Kits: Which is Actually Cheaper for a Family of Four?
The final logistical hurdle is the food itself. The desire to impress guests with a completely homemade feast often leads to the host spending hours, or even days, on prep, only to be too exhausted to enjoy the party. This is where you must make a crucial calculation: what is the true value of your time? While doing everything from scratch (DIY) is technically cheaper on a per-ingredient basis, it comes at a high cost to your time and energy.
Cost analysis shows that a full DIY barbecue meal for a party costs around $12-15 per person, whereas premium grill-ready meal kits can range from $20-25 per person. Looking only at this, DIY seems the obvious winner. However, this calculation ignores your most valuable asset: your time as the host. A recent survey of outdoor kitchen owners revealed a smarter, more efficient path: the “Hybrid Host” strategy.
This approach involves making high-impact, easy-to-batch items like salads and side dishes from scratch, while outsourcing the most time-consuming component—the main protein. By combining DIY sides with a butcher-prepared or premium grill kit for the main course, hosts were able to save an average of 3 hours of prep time. The financial cost was a moderate increase to about $18 per guest, but the payoff was immense: these hosts reported spending 65% more time actually engaging with their guests compared to those who did full DIY. This hybrid model offers the perfect balance of personalization, quality, and, most importantly, logistical efficiency.
The ultimate purpose of an outdoor kitchen is not just to cook outside, but to live outside. By applying a chef’s logistical mindset—auditing for inefficiency, planning for failure points, and valuing your own time—you transform a simple cooking area into a true satellite service station. Start today by auditing your next outdoor meal. Every trip inside is a data point. Use that data to design a system, not just a space, and finally reclaim your role as a host.