
Contrary to popular belief, achieving backyard privacy isn’t about building higher fences; it’s about mastering spatial perception and sensory design.
- Key principles include managing sightlines with curved paths and creating “destination zones” that intentionally draw the eye.
- Effective design also involves sensory layering, using elements like water features to mask noise and varied plantings to filter wind and views.
Recommendation: Focus on creating distinct “zones of seclusion” through a strategic combination of hardscape, softscape, and sensory elements rather than simply erecting solid barriers.
For homeowners in dense subdivisions, the backyard can often feel more like a stage than a sanctuary. The feeling of being on display—the “fishbowl effect”—is a common frustration, leading many to consider the most obvious solution: building a fortress of tall fences and dense hedges. While effective at blocking views, this approach often sacrifices light, air, and the very sense of openness that makes a garden enjoyable. It solves one problem by creating another: confinement.
The standard advice often revolves around lists of fast-growing trees or installing generic privacy screens. These are tools, but they are not a strategy. As landscape architects, we understand that true privacy is not about total obstruction. It’s about the sophisticated management of space, sightlines, and sensory experiences. It’s about creating a *feeling* of seclusion, even in a relatively open area. This requires a shift in thinking from brute-force blocking to nuanced, strategic design.
This guide moves beyond the fortress mentality. We will explore how to use architectural principles to shape your outdoor space. Instead of just building walls, we will learn how to direct the eye, control sound, filter wind, and create psychological boundaries. By layering these elements, you can craft a backyard that feels both private and expansive, a true retreat from the outside world.
This article details the specific strategies and design principles needed to transform an exposed yard into a private haven. From the psychology of pathways to the science of sound masking, you will find a complete blueprint for reclaiming your outdoor space.
Summary: How to Create Privacy in a Fishbowl Backyard Without Building a Fortress?
- Curved vs. Straight Paths: Which Makes a Small Garden Feel Bigger?
- Fountains or Fences: What Actually Blocks Road Noise Better?
- Glass Walls vs. Hedges: Blocking Wind Without Losing the View
- The “Destination Effect”: How to Lure Guests to the Far Corner of Your Yard?
- Sandboxes and Fire Pits: How to separate Kid Zones from Adult Zones safely?
- How to Stop Your Patio Umbrella from Taking Flight in 30mph Winds?
- Why “Always On” Porch Lights Might Actually Attract Burglars?
- How to Design a “Sensory Garden” That Reduces Anxiety Symptoms?
Curved vs. Straight Paths: Which Makes a Small Garden Feel Bigger?
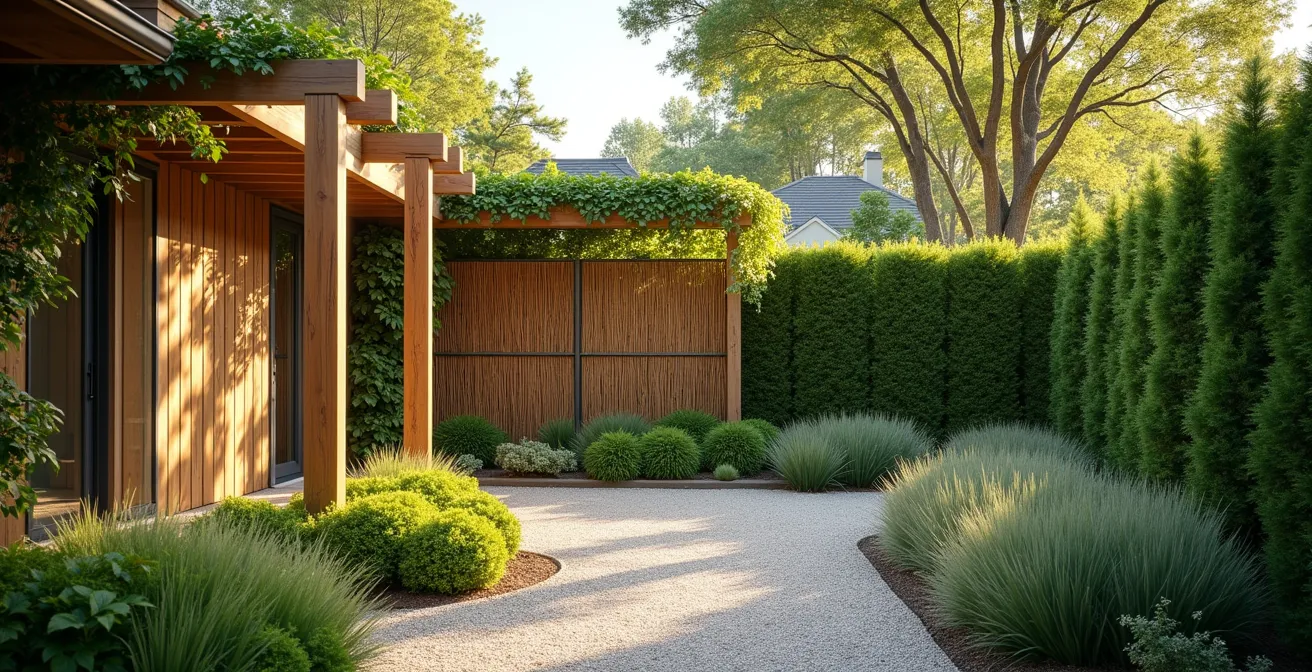
The journey through a garden is as important as the destination. The design of your pathways is a foundational tool for sightline management and creating perceived space. A straight path acts like an arrow, directing the eye immediately to the end of the yard and revealing everything at once. This reinforces a sense of smallness and exposure. In contrast, a curved path introduces an element of mystery and discovery. It forces a slower pace and controls what is seen and when.
This technique, known in Japanese garden design as miegakure or ‘hide and reveal’, creates the illusion of a larger, more complex space. By designing S-curves, you can partially obscure the view of what lies ahead, making the garden feel like it has secrets to unveil. A strategically placed curve can hide a direct line of sight from a neighbor’s window to your patio, creating a zone of seclusion without a single wall. As one walks the path, new vignettes and plant combinations are revealed, turning a simple walk into an experience.
For example, a project in Massachusetts used curved granite pathways not just for flow, but to delineate intimate zones around a pool area. This maintained an open feel while preventing the space from feeling like one large, exposed expanse. Varying the path’s width—narrowing it to encourage forward movement and widening it into “social pools” for gathering—further enhances this effect. Using stepping stones that lead off the main path at a 45-degree angle can also add to the sense of mystery, hinting at hidden corners waiting to be explored.
Fountains or Fences: What Actually Blocks Road Noise Better?
Visual privacy is only one part of the equation; auditory privacy is equally crucial for creating a true sanctuary. The constant drone of traffic, lawnmowers, or neighbors’ conversations can shatter any sense of peace. The common debate is whether to block sound with a solid barrier like a fence or mask it with a pleasant sound like a water feature. The answer, from a design perspective, is that they serve two fundamentally different functions.
A solid fence is effective at blocking mid-to-high frequency sounds, but it must be tall and have no gaps to be truly effective. This often leads back to the “fortress” problem. A water feature, on the other hand, doesn’t block sound—it masks it. The “white noise” produced by moving water has a broad frequency spectrum that covers up intrusive background noises, making them less noticeable and less jarring to the human ear. The brain latches onto the closer, more pleasant sound of the water, effectively tuning out the distant annoyance.
The most effective strategy is a layered system that combines blocking, absorbing, and masking. This involves using dense, multi-layered hedges to absorb sound, a solid fence or wall at the property line to block direct sound waves, and a water feature placed near primary seating areas to mask any remaining noise. This creates a comprehensive sound-dampening environment. The following table breaks down the effectiveness of each method.
| Method | Effectiveness | Frequency Range | Best Application |
|---|---|---|---|
| Solid Fence | Blocks sound | Mid-high frequencies | Property perimeter |
| Water Feature | Masks sound | All frequencies | Near seating areas |
| Dense Hedges | Absorbs sound | All frequencies | Layered boundaries |
| Combined System | Block + Mask + Absorb | Complete spectrum | Maximum privacy |
Glass Walls vs. Hedges: Blocking Wind Without Losing the View
Controlling the elements is a critical aspect of creating a comfortable outdoor space. Wind, in particular, can make a patio or seating area unusable. The intuitive solution might be a solid barrier like a glass wall to preserve a view, or a dense hedge to block the wind completely. However, landscape design principles reveal a more nuanced and effective approach: filtering wind is often better than blocking it.
Solid barriers like walls or fences create high-pressure zones on the windward side and an area of negative pressure on the leeward side. This can cause uncomfortable turbulence and eddies just a short distance from the barrier. A “living wall” or semi-permeable hedge, on the other hand, doesn’t stop the wind; it slows it down and filters it. This creates a much larger and more comfortable zone of protection. In fact, landscape design studies show that semi-permeable hedges can be 30-50% more effective at creating comfortable, wind-protected zones than solid barriers.
This approach also offers superior flexibility for maintaining views. Instead of an all-or-nothing glass panel, you can strategically prune “windows” into a hedge to frame a desirable vista while still blocking the line of sight to a neighbor’s house. Layering plants of varying heights—a taller evergreen backdrop with a shorter deciduous hedge in front—creates a sophisticated filter that provides year-round interest and adapts to the seasons. This sensory layering of textures and forms is far more dynamic and ecologically beneficial than a sterile glass wall, providing shelter and food for wildlife while enhancing the garden’s beauty.
The “Destination Effect”: How to Lure Guests to the Far Corner of Your Yard?
A key principle of deflecting attention away from exposed areas is to create a compelling focal point elsewhere. This is the “Destination Effect”: the practice of designing an irresistible feature that naturally draws the eye and foot traffic towards a specific, intentionally private zone. Instead of trying to hide your exposed patio, you create a far more interesting spot in a secluded corner, making it the yard’s social and visual anchor.
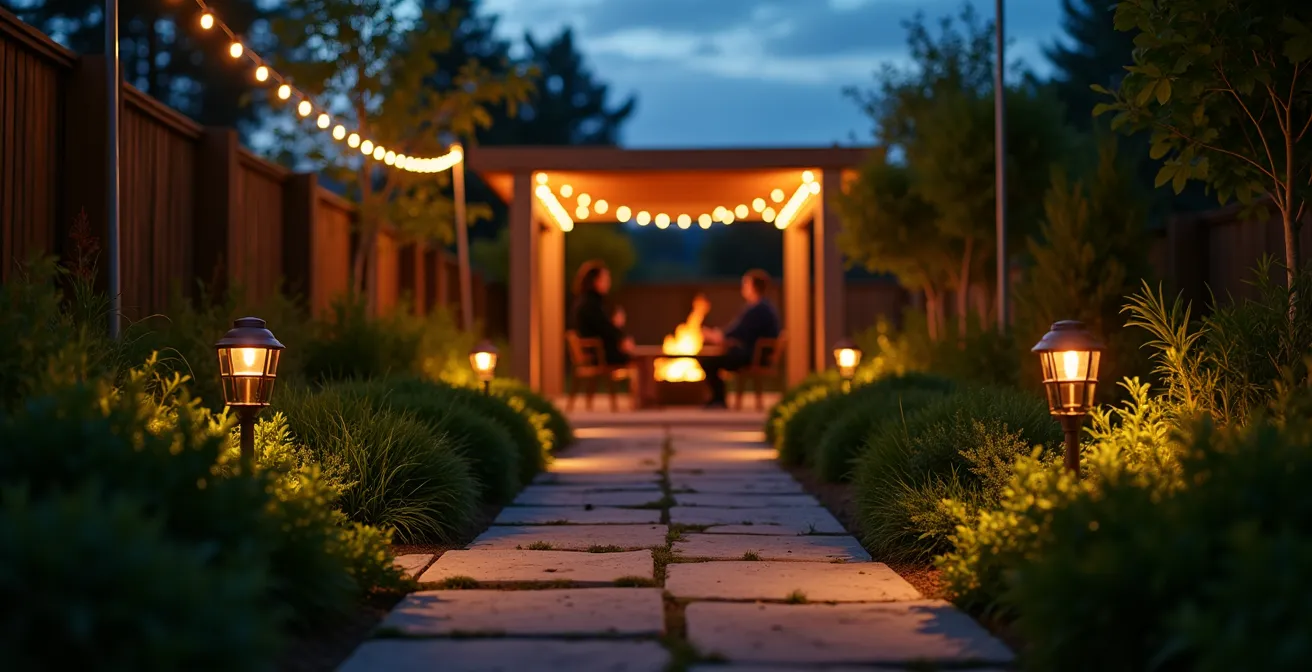
This destination doesn’t have to be grand. It could be a cozy fire pit area, a hammock nestled between two trees, a striking sculpture, or a small dining nook under a pergola. The key is to make the journey to it as appealing as the destination itself. Use your pathway design to create a winding route. Employ layered lighting as a “breadcrumb trail,” with subtle uplighting on plants and low-voltage path lights that guide the way, as shown in the image below. The destination itself should glow invitingly, signaling it as the heart of the space.
The most powerful destinations engage multiple senses. A case study in garden design highlighted a trellis with a climbing rose and a pyracantha bush. The structure provided a visual anchor, the rose offered a beautiful scent, and the pyracantha’s berries attracted songbirds, adding sound and movement. This multi-sensory appeal creates a powerful pull, making the destination the natural place to gather and relax, far from the prying eyes near the house.
Sandboxes and Fire Pits: How to separate Kid Zones from Adult Zones safely?
Even within a private backyard, creating distinct zones for different activities is essential for both safety and relaxation. The chaotic energy of a kids’ play area can easily overwhelm a space meant for quiet adult conversation. The goal is to achieve psychological separation without building high walls that obstruct supervision. This is accomplished through subtle but clear spatial cues.
One of the most effective methods is using changes in elevation. Elevating an adult patio or deck by just one or two steps creates a clear, subconscious boundary. It designates the upper level as a distinct “room” without impeding sightlines to the lower play area. Another powerful tool is the use of low, multi-functional seating walls, typically 24-30 inches high. These provide a physical barrier that contains sandbox sand or loose toys while also offering extra seating for the adult zone.
Material changes on the ground are also highly effective. Transitioning from a stone or paver patio in the adult zone to a soft surface like rubber mulch or grass in the kid zone sends a strong signal about the function of each space. Finally, using large, tall planters as moveable boundaries offers flexibility, allowing you to reconfigure the space as needs change. The key is to maintain clear visibility for safety while using these design elements to create a sense of order and separation.
Action Plan: Structuring Safe and Separate Zones
- Define Zones: Clearly map out the intended areas for adult relaxation (e.g., dining, fire pit) and children’s play (e.g., sandbox, lawn).
- Introduce Elevation: If possible, create a 1-2 step change in elevation to elevate the primary adult seating area, creating a natural overlook and psychological boundary.
- Build Low Barriers: Install low (24-30 inch) seating walls or use a series of large, heavy planters to physically delineate the play zone without blocking views.
- Vary Ground Materials: Use distinct ground covers to signal a change in function, such as transitioning from hardscape pavers to soft rubber mulch or turf.
- Ensure Sightlines: From the primary adult seating position, verify that there is a clear, unobstructed line of sight to all areas of the children’s zone for constant supervision.
When dividing spaces, it’s critical to weigh the effectiveness of each method against its impact on safety and visibility. The following table provides a clear analysis of common zone division techniques.
| Method | Safety Rating | Visibility | Flexibility |
|---|---|---|---|
| Low Seating Walls | Excellent | Full supervision | Permanent |
| Elevated Decking | Good | Clear sightlines | Permanent |
| Sensory Boundaries | Very Good | Unobstructed | Changeable |
| Portable Screens | Good | Partial | Highly flexible |
How to Stop Your Patio Umbrella from Taking Flight in 30mph Winds?
A patio umbrella is often a first-line defense for creating a small zone of overhead privacy and shade. However, it can quickly become a liability in windy conditions. Many homeowners are shocked to learn how little wind it takes to turn their umbrella into a dangerous projectile. According to stability testing, even a 9-foot umbrella with a 100lb base withstands only 15-20 mph winds. For winds reaching 30mph, a standard base is simply inadequate.
The first principle of wind resistance is reducing lift. Opt for umbrellas with a vented or double-canopy design. These vents allow upward wind pressure to escape through the top, reducing the powerful lifting force by up to 40% and preventing the canopy from inverting. The second principle is secure anchoring. For maximum stability, a standard weighted base is not enough. The best solutions involve dual anchoring: threading the umbrella pole through a sturdy patio table and *also* securing it in a heavy, weighted base below.
For truly windy locations, more permanent solutions are required. Installing an in-ground concrete sleeve provides the most secure mounting point. For cantilever or offset umbrellas, which are particularly susceptible to wind, it’s crucial to use a cross-member base that can be heavily weighted with sandbags or custom pavers. From an engineering perspective, the shape of the base also matters; for a given weight, a wide, circular base offers greater stability against tipping than a square or triangular one. Finally, choose an umbrella with fiberglass ribs. Unlike aluminum, fiberglass ribs are designed to flex in strong gusts and return to their shape, rather than bending permanently or snapping.
Why “Always On” Porch Lights Might Actually Attract Burglars?
Conventional wisdom suggests that a well-lit home is a secure home, leading many to leave porch and backyard lights on all night. However, this “always on” approach can be counterproductive from a security standpoint. A constant, predictable source of light creates deep, reliable shadows where an intruder can hide and work undetected. It illuminates the landscape for them, helping them spot potential entry points and obstacles. In essence, you are lighting their way.
A far more effective strategy is layered, motion-activated lighting. The goal is not constant illumination, but the element of surprise. A sudden flood of bright light is jarring and exposes an intruder, making them feel seen and far more likely to flee. This system involves two layers. The first is a low-level, warm ambient light (around 2700K) on pathways or steps, providing just enough light for safe navigation and creating a welcoming atmosphere. This light is not bright enough to create deep shadows.
The second layer consists of powerful, motion-activated floodlights positioned at key entry points, corners, and access paths. These should be a cool-white light (4000K or higher), as the stark, bluish quality is more alarming than warm light. When triggered, they instantly eliminate all shadows and create a “spotlight” effect. Combining this with random timer patterns for interior lights creates the illusion of an active, occupied home, which is a powerful deterrent. Strategic lighting isn’t about brightness; it’s about control and unpredictability.
Key takeaways
- True privacy comes from strategic spatial design, not just building walls.
- Layering sensory elements like sound, texture, and light is more effective than single solutions.
- Creating “destination zones” and managing sightlines are key architectural principles for perceived seclusion.
How to Design a “Sensory Garden” That Reduces Anxiety Symptoms?
The ultimate expression of a backyard sanctuary is a sensory garden—a space intentionally designed to engage all five senses in a gentle, restorative way. This approach, rooted in biophilic design, goes beyond simple aesthetics to create an environment that can actively reduce stress and anxiety. It’s the culmination of all the principles we’ve discussed: managing what you see, hear, and feel to shape a positive emotional experience.
The visual component focuses on calming, repetitive patterns found in nature. Incorporate plants with natural fractal patterns, such as the unfurling fronds of a fern, the geometric spirals of succulents, or the branching structure of a Japanese maple. These patterns are inherently soothing to the human brain. The sense of sound is engaged by layering natural noises: the gentle rustle of ornamental grasses in the breeze, the soft clinking of bamboo chimes, and the ever-present murmur of a water feature. These sounds mask external noise and promote a meditative state.

Touch is engaged through “grounding zones.” These are areas with barefoot-friendly textures like soft moss, fine sand, or smooth, cool river stones that encourage a direct physical connection to the earth. Scent can be layered with fragrant plants like lavender, jasmine, or rosemary, placed along paths where they will release their aroma when brushed against. Finally, the sense of space itself is used to create enclosed “refuge” areas, such as a bench tucked under the low-hanging canopy of a tree, providing a powerful feeling of safety and enclosure. By weaving these elements together, the garden becomes more than just a private space; it becomes a therapeutic one.
By moving beyond the simple goal of blocking views and embracing a holistic design approach, you can transform your “fishbowl” backyard into a dynamic, multi-layered sanctuary that nurtures your well-being. The next step is to begin assessing your own space and identifying opportunities to apply these principles.