

True garden automation isn’t about buying gadgets; it’s a system of one-time investments with compounding time-saving returns.
- Foundational choices like pavers over wood eliminate annual “maintenance debt.”
- Layered strategies, from robot mowers to strategic plantings, create a self-sustaining ecosystem that minimizes weekly chores.
Recommendation: Analyze your weekly time spent on maintenance and start by tackling the single biggest time-drain with a high-ROI automated solution.
You appreciate a beautiful, well-kept yard, but as a busy professional, your calendar is a zero-sum game. Every hour spent mowing, weeding, or staining a deck is an hour not spent on your career, with family, or traveling. The desire for a pristine landscape clashes with the reality of having virtually no time to create it. This is the core paradox for any time-poor property owner. The standard advice—install a sprinkler system, throw down some mulch—is piecemeal and fails to address the underlying problem. These are merely tasks, not a cohesive strategy.
What if the solution wasn’t about working harder or even just smarter, but about designing a system that makes most maintenance obsolete? The real hack isn’t found in a new tool, but in a series of upfront strategic decisions that eliminate future labor. This is the principle of erasing “maintenance debt”—the recurring time-tax you pay for inefficient initial choices. It’s about shifting your mindset from “doing yard work” to building a landscape that largely takes care of itself, creating compounding time-savings year after year.
This guide provides an efficiency-obsessed blueprint for reclaiming your weekends. We will analyze the return on investment (ROI) of the most critical automation decisions you can make. From the hardscaping foundation to intelligent privacy screening, each section is designed to help you build a truly low-maintenance outdoor space that works for you, not the other way around.
To navigate this system-based approach to garden automation, we’ve broken down the key strategic decisions you’ll face. The following sections provide a clear, data-driven analysis to help you build your personal time-saving blueprint.
Summary: Your Blueprint for a Hands-Off Garden
- Pavers or Decking: Which Requires Less Annual Maintenance?
- Landscape Fabric vs. Cardboard: Which Mulching Method Actually Stops Weeds?
- The Best Hedge Plants That Only Need Trimming Once a Year
- Lawn Service vs. Robot Mower: Which Pays Off Faster Over 2 Years?
- The 1-Hour Winterizing Routine That Saves Your Pots from Cracking
- Glass vs. Plastic Lenses: Which Survives the Lawn Trimmer Better?
- Where to Spend $5,000: Curb Appeal or Backyard Oasis?
- How to Create Privacy in a Fishbowl Backyard Without Building a Fortress?
Pavers or Decking: Which Requires Less Annual Maintenance?
The choice between a paver patio and a wood deck is one of the most significant foundational decisions you will make, with massive implications for your future “maintenance debt.” A wood deck, while aesthetically pleasing, is a subscription to annual labor. It demands regular cleaning, sanding, and re-staining to prevent rot and splintering. This work consumes 8-10 hours each year and costs hundreds in materials. It’s a recurring tax on your time and wallet. In contrast, a paver patio is a one-time investment in passive enjoyment.
From an efficiency standpoint, the data is overwhelmingly clear. Properly installed pavers require minimal upkeep—typically a simple pressure wash once a year and re-sanding the joints every 3-4 years, a task taking only 2-3 hours. In terms of longevity, the difference is just as stark. According to a long-term durability comparison, wood decks may last 10-30 years, while pavers can exceed 30 years. Even composite decking, a lower-maintenance alternative to wood, still requires annual cleaning and structural checks.
The strategic choice for a time-hacker is obvious. By opting for pavers, you are buying back an entire weekend of labor, every single year, for decades. You front-load the effort into a proper installation and then reap the compounding time-savings for the life of your home. It’s a classic “set-it-and-forget-it” system that pays dividends in your most valuable currency: free time.
Landscape Fabric vs. Cardboard: Which Mulching Method Actually Stops Weeds?
Controlling weeds is a relentless time-sink. The common solution, landscape fabric, seems like a perfect automation hack. You roll it out, cover it with mulch, and weeds disappear. However, this is a short-term fix that often creates long-term problems. While initially effective, landscape fabric compacts the soil, starves beneficial microbes, and eventually, weeds simply start growing in the mulch on top of the fabric. Removing it years later is an arduous, time-consuming task.
The lifestyle hacker’s alternative is cardboard sheet mulching. It’s a counter-intuitive but vastly superior system for garden beds. It’s free, biodegradable, and actively improves soil health as it decomposes. It smothers existing weeds, attracts earthworms, and adds organic matter to the soil, reducing the need for future amendments. While its lifespan is shorter, renewing it is as simple as adding a new layer on top. For the ultimate efficiency, you are not just stopping weeds; you are building a self-sustaining, fertile soil system that requires less input over time.
A direct comparison of weed barrier methods highlights the trade-offs, making it clear that the best choice depends on the application.
| Feature | Landscape Fabric | Cardboard |
|---|---|---|
| Initial Effectiveness | 85-95% weed blocking | Very effective initially |
| Lifespan | Up to 10 years | 6-12 months |
| Soil Health Impact | Can compact soil, harm microbes | Enriches soil as it decomposes |
| Long-term Issues | Weeds grow on top, difficult removal | Requires regular replacement |
| Best Use Case | Under hardscapes only | Garden beds, vegetable patches |
The table shows that landscape fabric has a place—under hardscapes like gravel paths where soil health isn’t a concern. But for living garden beds, cardboard is the superior strategic choice. It works *with* the garden’s ecosystem, not against it, reducing future work while building a more resilient, low-maintenance environment.
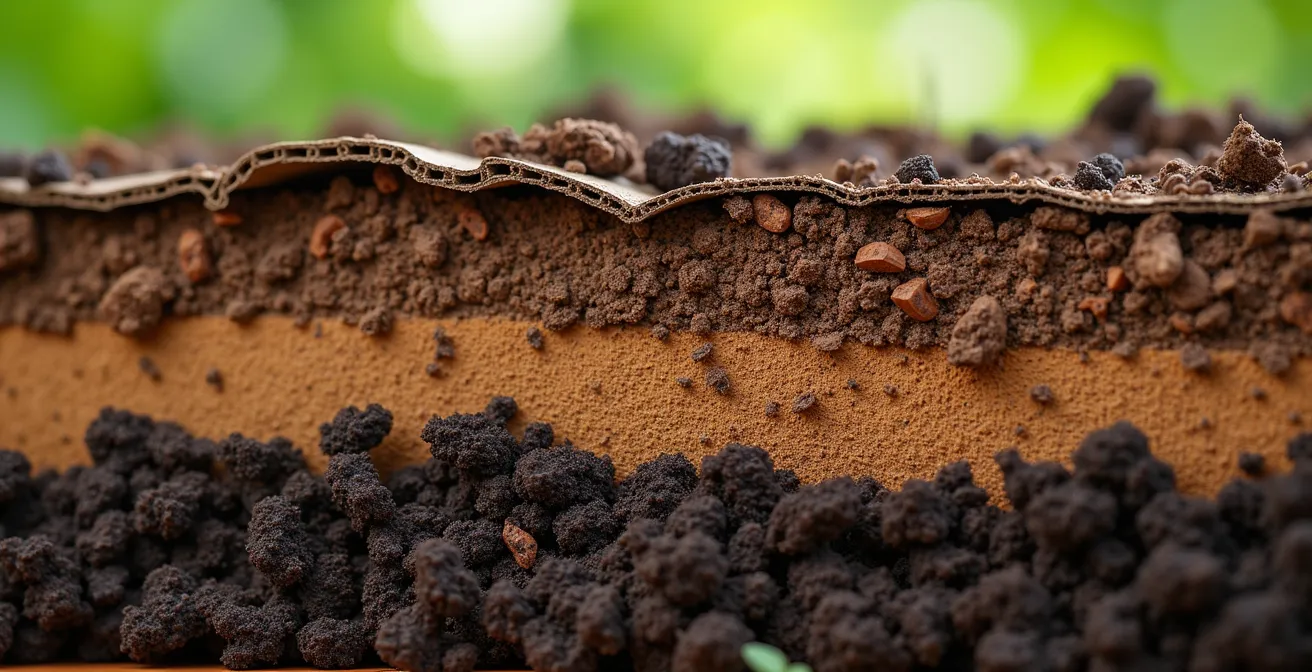
As this cross-section illustrates, the cardboard layer is not a permanent barrier but a temporary, decomposing component of a healthy soil ecosystem. This is the key difference: one is an inert plastic sheet, the other is a system-enhancing tool.
The Best Hedge Plants That Only Need Trimming Once a Year
A privacy hedge can quickly become your biggest source of maintenance debt. Choosing a fast-growing species like privet means committing to multiple trimming sessions every summer. For the efficiency-obsessed homeowner, the goal is to select a plant whose natural growth habit and speed align with a “once-a-year” maintenance schedule. The hack is not in the trimming technique, but in the initial plant selection.
The ideal low-maintenance hedge plant has three key characteristics: a slow-to-moderate growth rate, a dense branching structure, and a mature size that is close to your desired height. This minimizes the need for constant shearing to keep it in check. Instead of fighting the plant’s nature, you choose a plant that naturally wants to be what you need it to be. This is a core principle of garden automation: let the system do the work for you.
Consider these top-tier choices for an automated, once-a-year trim:
- Hicks Yew (Taxus x media ‘Hicksii’): A classic choice for a reason. It’s extremely dense, has a columnar shape that requires minimal side-trimming, and a slow growth rate that makes an annual touch-up more than sufficient.
- Emerald Green Arborvitae (Thuja occidentalis ‘Smaragd’): This evergreen holds its tight, narrow pyramid shape naturally, virtually eliminating the need for width-pruning. Its moderate growth can be easily managed with a single trim in late spring.
- Boxwood (Buxus species): For lower hedges, boxwoods are unparalleled. They are famously slow-growing and take shearing so well that a single annual shaping is all that’s required to maintain a formal, clean look.
By investing in one of these “set-it-and-forget-it” plants, you are buying back countless hours you would have spent on a ladder with hedge trimmers. The upfront cost is the same, but the long-term time savings are immense.
Lawn Service vs. Robot Mower: Which Pays Off Faster Over 2 Years?
The endless cycle of lawn mowing is the ultimate time-thief for property owners. The two main solutions are outsourcing (a lawn service) or automating (a robot mower). A lawn service offers convenience but at a high, recurring cost and with a loss of control. A robot mower requires a significant upfront investment but offers a clear path to a long-term ROI in both time and money.
For the lifestyle hacker, this is a straightforward breakeven analysis. The key is to calculate the upfront investment payoff. A lawn service for a half-acre yard can cost $2,400-$4,800 over two years. A capable robot mower for the same area has a total cost of ownership in the $1,500-$2,750 range over the same period. In most scenarios, the robot mower pays for itself in under two years, after which the ongoing cost is negligible—just a few dollars a month in electricity.
This 2-year cost analysis from Consumer Reports makes the financial case clear.
| Cost Factor | Robot Mower | Lawn Service |
|---|---|---|
| Initial Investment | $650-$2,650 | $0 |
| Monthly Operating Cost | $2-5 electricity | $100-200 service fee |
| 2-Year Total (0.5 acre) | $1,500-2,750 | $2,400-4,800 |
| Time Investment | 4-6 hrs setup, 2 hrs/year maintenance | Scheduling, quality checks |
| Secondary Benefits | Daily mulching improves lawn health | Professional edging included |
Beyond the raw numbers, the robot mower is a superior system. It improves lawn health through daily micro-cuttings (a practice called “mulching”), which returns nutrients to the soil and reduces the need for fertilizer. It operates silently day or night, producing zero emissions. It’s not just a mower; it’s an automated lawn health system. While a service provides professional edging, the holistic benefits and long-term financial payoff of owning the automated system are far more compelling for anyone focused on efficiency.
The 1-Hour Winterizing Routine That Saves Your Pots from Cracking
The end of the growing season presents a final, crucial task: protecting your pots from winter damage. A single freeze-thaw cycle can crack an expensive terracotta or ceramic pot, wasting your investment. Most people either ignore this task until it’s too late or spend an entire afternoon randomly moving heavy containers. An efficiency-obsessed approach transforms this chore into a streamlined, one-hour “system shutdown” protocol.
The key is to triage and systematize. Not all pots are created equal. Terracotta is the highest risk due to its porosity, so it gets top priority. Grouping other pots in a protected microclimate against a house wall saves the effort of hauling everything into a shed. The goal is to achieve maximum protection with minimum movement. This isn’t just about saving the pots; it’s about saving you from a frustrating and heavy-lifting chore year after year.
By turning this into a repeatable, timed process, you eliminate decision fatigue and wasted effort. You execute the plan and you’re done. This checklist is your blueprint for a fast, effective winterization that protects your assets and your time.
Your 60-Minute Pot Winterization Plan
- Minutes 0-20 (Triage & Clean): Identify and empty all terracotta pots. They are most vulnerable to cracking. Quickly rinse them out and set them aside.
- Minutes 20-35 (Group & Consolidate): Group all remaining planted pots (ceramic, plastic) together against the warmest, most protected wall of your house (often south or west-facing).
- Minutes 35-45 (Store the Vulnerable): Stack the empty, cleaned terracotta pots upside-down in a dry, sheltered location like a garage, shed, or covered porch.
- Minutes 45-50 (Protect the Group): Cover the cluster of grouped pots with a breathable frost blanket or tarp. This creates a microclimate that buffers against the harshest temperature swings.
- Minutes 50-60 (Document & Finish): Take a quick photo or make a note of which plants are where for easy setup in the spring. Sweep the area and store your supplies.
Glass vs. Plastic Lenses: Which Survives the Lawn Trimmer Better?
When selecting outdoor lighting fixtures, a common debate is whether to choose glass or plastic lenses. Glass offers superior clarity and scratch resistance but can shatter on impact. Plastic (polycarbonate) is highly impact-resistant but can yellow over time and scratches more easily. The immediate question seems to be which material is tougher. However, this is a classic case of focusing on the wrong problem. The ultimate hack isn’t in the material, but in the system design: strategic placement.
The most effective way to protect your landscape lighting from a lawn trimmer, mower, or stray soccer ball is to design your layout so the fixtures are physically shielded. No matter how tough the lens is, a direct, repeated impact will eventually cause failure. A truly automated and resilient lighting system is one where the fixtures are inherently protected from common garden hazards. This means thinking like a strategist, not just a consumer choosing between two options.

As the image demonstrates, the most robust solution is intelligent placement. By tucking lights behind a rock border, integrating them into the base of a raised bed, or placing them within dense, sturdy groundcover, you make the material choice secondary. The fixture is simply not in the path of danger. This system-level thinking saves you the future cost and hassle of replacing damaged lights, regardless of whether they have glass or plastic lenses. Protection through placement is a far more powerful and permanent solution than protection through material alone.
Where to Spend $5,000: Curb Appeal or Backyard Oasis?
When you have a limited budget for automation and improvement, the question of allocation becomes critical. Where does a $5,000 investment deliver the highest return in time-savings and enjoyment? The two primary “portfolios” are enhancing curb appeal (the front yard) or creating a backyard oasis (the private space). The optimal choice depends entirely on your personal ROI calculation: do you value passive public presentation or active private relaxation more?
Investing in curb appeal often yields more straightforward automation wins. A robot mower and a smart irrigation system can automate the two most time-consuming front-yard tasks, saving hours each week. These improvements also have a high ROI in terms of property value. A backyard oasis investment tends to focus on enhancing specific use-cases—an automated drip system for a vegetable garden or smart lighting for an entertainment deck. The time-savings might be less, but the personal enjoyment factor can be significantly higher.
This ROI and time-saving analysis breaks down how a $5,000 budget might be allocated for each goal.
| Investment Area | $5,000 Budget Allocation | Weekly Time Saved | Property Value Impact |
|---|---|---|---|
| Curb Appeal | Robot mower ($2,000) + Smart irrigation ($1,500) + Low-maintenance perennials ($1,500) | 3-4 hours | 75% ROI on improvements |
| Backyard Oasis | Automated drip system ($1,000) + Composite decking area ($3,000) + Smart lighting ($1,000) | 2-3 hours | 50% ROI but higher personal enjoyment |
Ultimately, the decision is a personal one. If the satisfaction of a perfectly manicured front lawn that you never have to touch brings you the most joy, focus your capital there. If you dream of relaxing in a perfectly lit backyard without ever having to water a plant, the oasis is your priority. A hybrid approach is possible, but it risks under-optimizing both areas. For the true lifestyle hacker, the best strategy is to identify the single greatest point of friction in your life and apply the full budget to automating it away completely.
Key Takeaways
- Prioritize eliminating “maintenance debt” with smart foundational choices like pavers and strategic soil preparation to prevent future work.
- Calculate the 2-year ROI for any automation investment over $500 to ensure the upfront cost is justified by long-term time and money savings.
- Layer multiple passive systems—such as slow-growing plants, drip irrigation, and strategic screening—for compounding time savings that build year over year.
How to Create Privacy in a Fishbowl Backyard Without Building a Fortress?
For a busy professional, a backyard is a sanctuary. But if it feels like you’re on display to every neighbor—a “fishbowl” effect—that sense of peace is lost. The default solution, a massive fence or a dense wall of fast-growing trees, often creates a new set of problems: high cost, significant maintenance, and a boxed-in, fortress-like feeling. The efficiency-focused approach is not about brute-force blocking, but about precision privacy. It’s a surgical system designed to solve the specific problem with the least amount of effort and material.
Instead of walling off the entire yard, you identify and disrupt the specific sightlines that are causing the issue. This layered, intelligent approach feels more natural, costs less, and requires significantly less upkeep. Adding an element of sound masking, like a water feature, further enhances privacy by scrambling conversations, creating a truly secluded oasis. This is the ultimate hack: achieving a better result with a more nuanced, less-obtrusive system.
As detailed in a guide from garden automation experts Gardenly, the process involves a few strategic steps:
- Map Sightlines: The first step is to stand in your main seating or entertaining areas and identify the specific windows or decks from which neighbors can see you. This is your problem map.
- Use Specimen Trees: Instead of a continuous hedge, plant one or two larger specimen trees precisely where they will block the most critical sightlines. This is more effective and feels less confining.
- Layer Plantings: Create depth and year-round screening by layering plants of different heights. Use taller evergreens (6-8 ft) as the backbone, then add deciduous shrubs (4-6 ft) and ornamental grasses (3-4 ft) in front.
- Add Sound Masking: Install a simple water feature, like a fountain or small waterfall. The gentle sound of running water effectively masks conversation, providing auditory privacy.
- Automate the Upkeep: Ensure all new privacy plantings are on an automated drip irrigation system to remove the maintenance burden and ensure they establish quickly.
Start by auditing your single biggest time-waster in the garden this weekend. Apply one of these high-ROI principles, make a strategic one-time investment, and begin the process of reclaiming your time, permanently.
Frequently Asked Questions on Garden Automation
Which option provides better automation potential?
Curb appeal investments typically offer more automation opportunities with robot mowers and smart irrigation covering larger areas, while backyard automation focuses on specific zones like vegetable gardens or entertainment spaces.
How do I factor in my lifestyle preferences?
Consider whether you value public presentation (curb appeal) or private relaxation (backyard oasis). Curb appeal is passive enjoyment while backyard improvements offer active use opportunities.
What if I split the budget between both?
A hybrid approach with $2,500 each allows for a basic robot mower plus essential backyard automation, though neither area gets fully optimized.